3D Printing 目黒駅!
The inspiration came from Tokyo's oldest train line - in pictures. Instead of another photo, I wanted a 3D object I could hold.
Pipeline
1) Get a City Model With Terrain
I used CADMAPPER (OpenStreetMap source) and exported a SketchUp model with topography and 3D buildings.
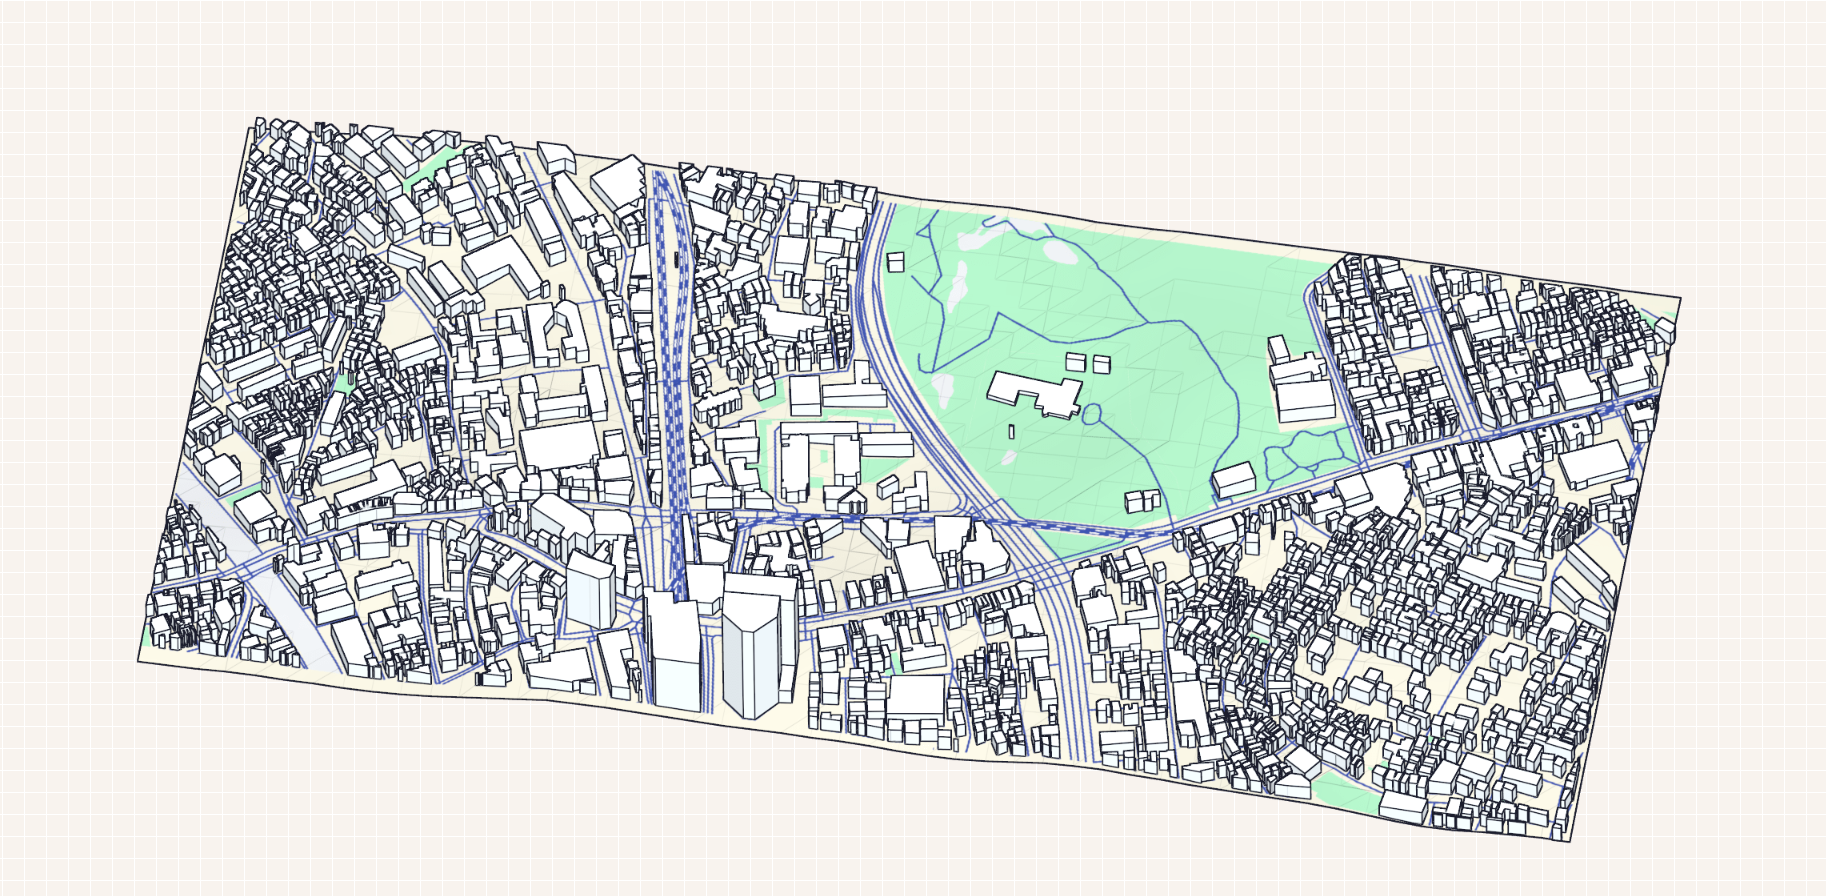
Area: 0.98 km²
Buildings: 2035 total, 21 with height value (1%)
Topography: Included, 4.00 m above sea level
Settings: Road centerlines, 3D buildings (no value = 50.0 m)
Limitation: only 21 out of 2035 buildings had real height data, so many structures relied on defaults.
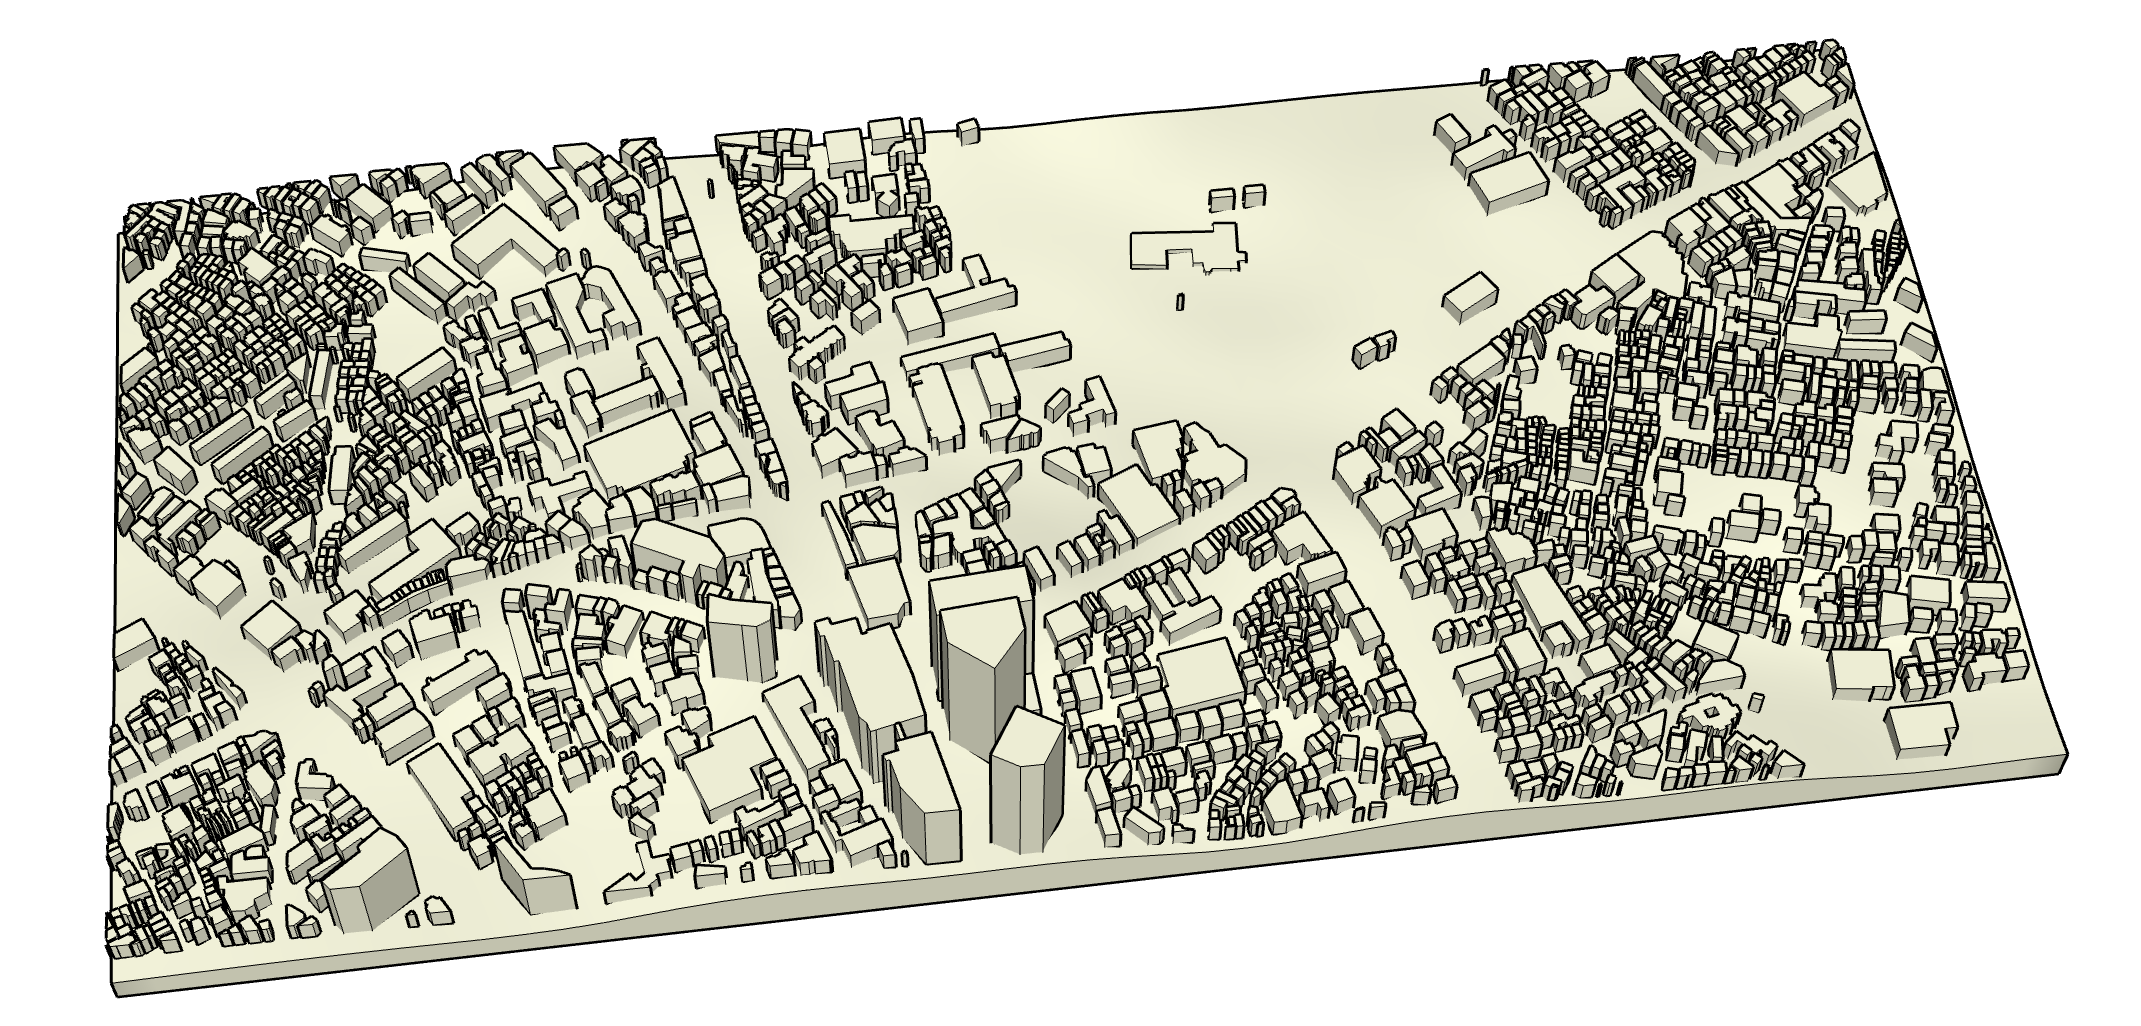
2) Prepare and Clean the Model
In SketchUp Pro (trial), I kept only buildings/topography/core layer, used Eneroth Terrain Volume, then refined base height and geometry before export.
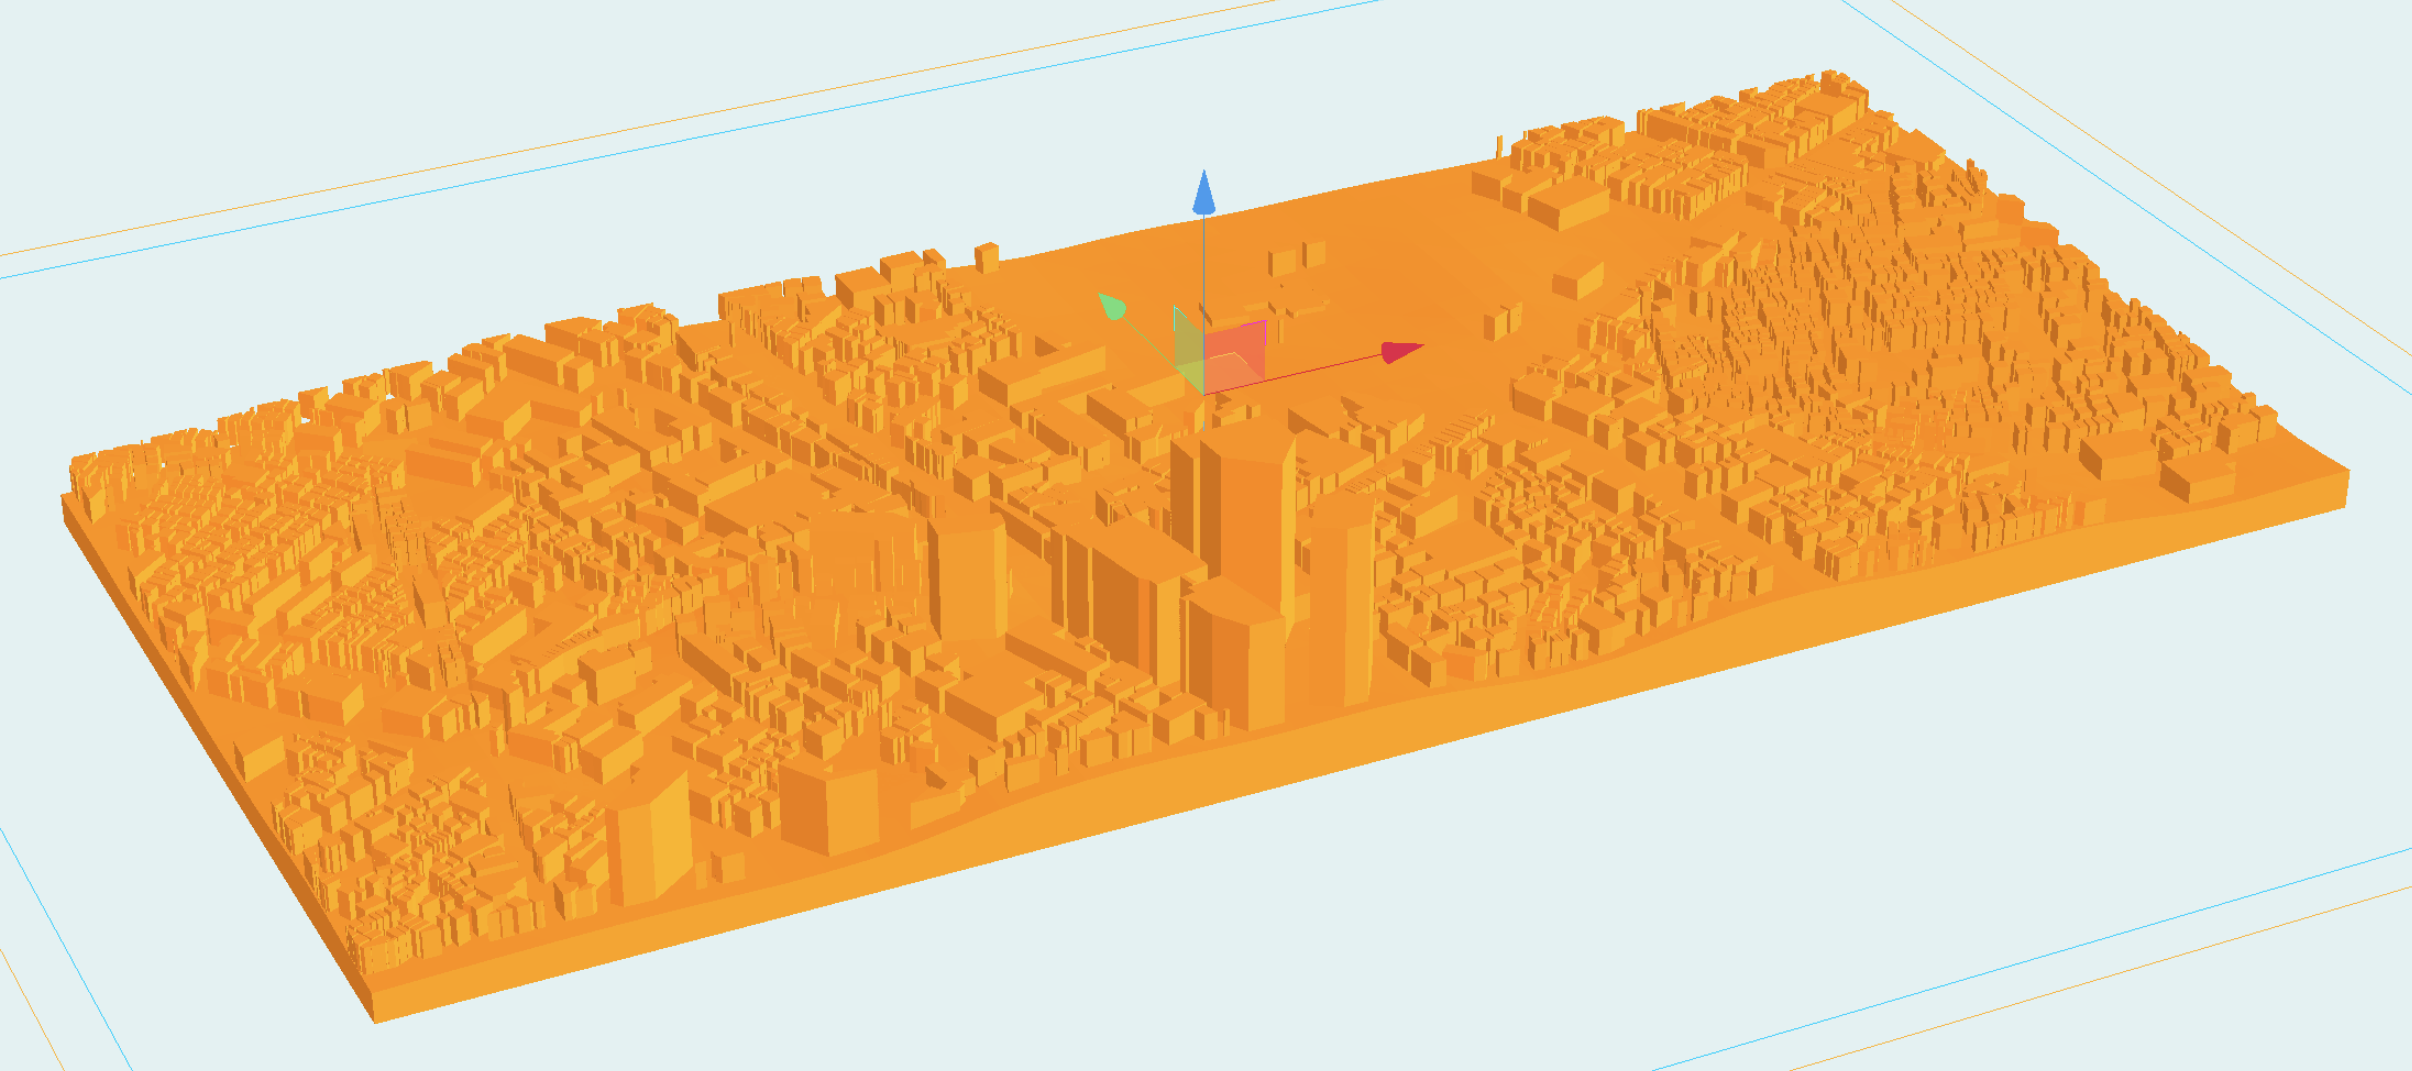
3) Slice and Print
After exporting STL, I sliced the model into G-code, resized it to fit the printer bed, and printed.
Result
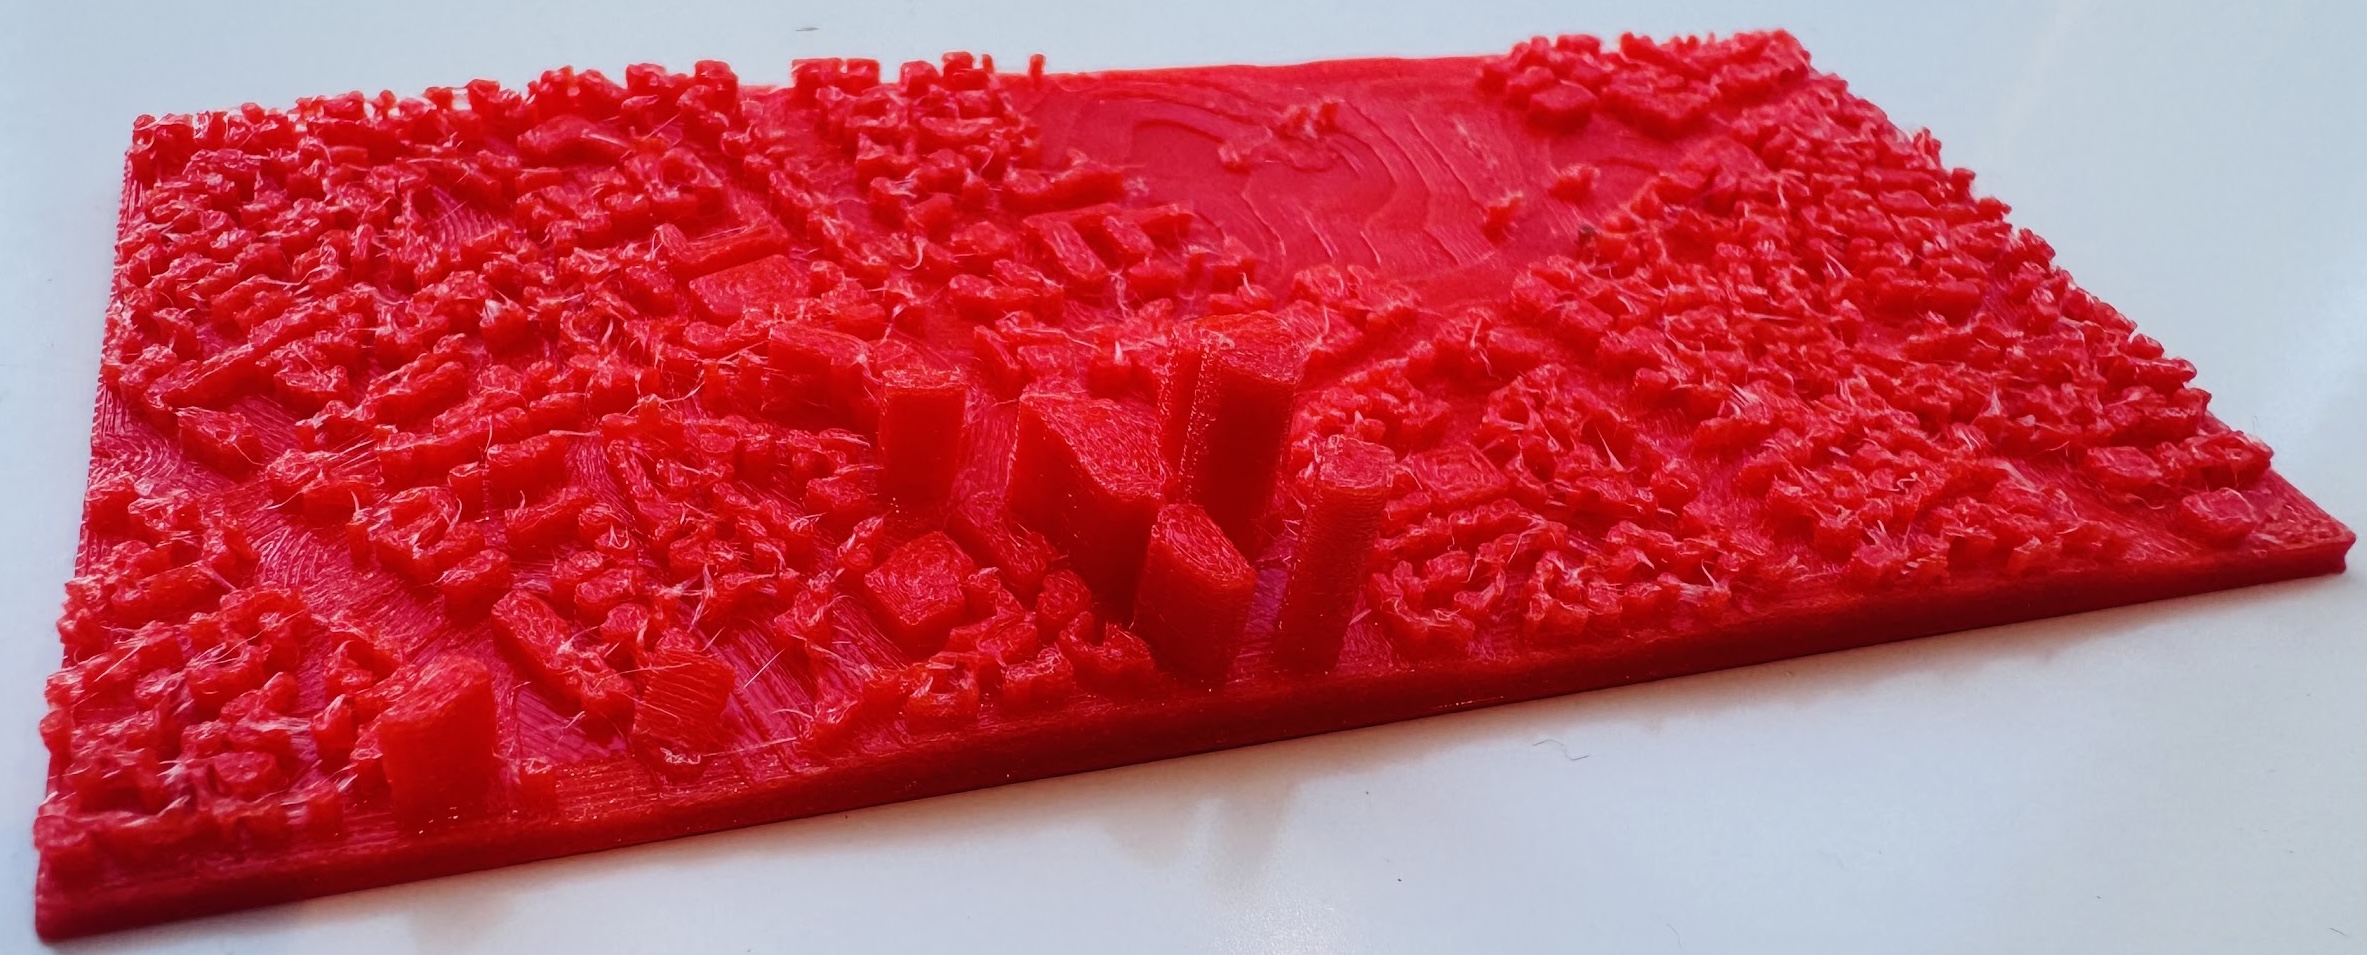
The print is imperfect (limited detail, no color, some artifacts), but the process was worth it. If I redo it, I would spend more time correcting building heights and tuning scale before slicing.